from Chrysler pushbutton transmissions
I am nearly completed with the restoration of a 1962 300H. Unlike some other projects, this car has been a sweet heart. No parts mysteriously disappeared during the project, no knuckles were skinned, and no expensive problems unexpectedly developed. Indeed, a sweet heart restoration. But after I re-filled the transmission, there was a leak from a small spot of damage to the transmission selector cable sheath. Rather than attempt a repair, I decided to change it out with a new cable.
New push button cables are available: Murray Park, is a distributor
as is Van's and Atlas. As far as I know, Imperial Services is the only manufacturer of these cables but they no longer sell direct so you have to use a distributor.
Over the years I've removed about a dozen cables from transmissions. Some cables I was able to remove per the service manual, some I was not. This one fell into the "NOT" category and I decided it was time to take photos so the next time the job will go according to Hoyle.

|
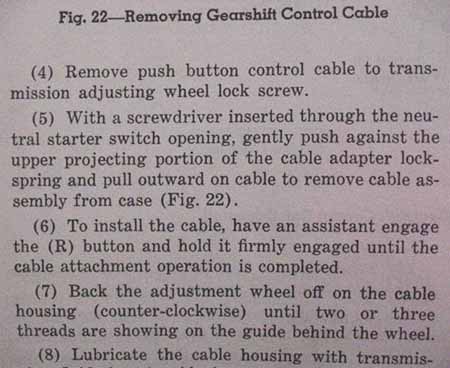
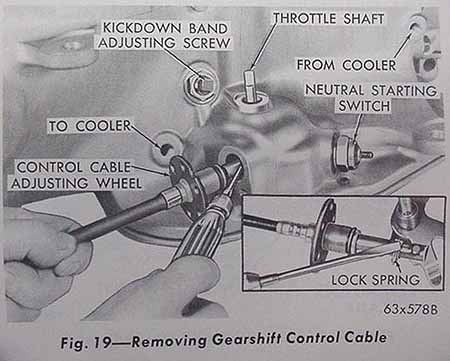
This is from the 1962 service manual. This isn't the view you would normally have when doing this job since you'll be under the car looking up. Plus, you'll have torsion bars and exhaust pipes to contend with. And don't forget the shop light shining in your eyes.... |
|
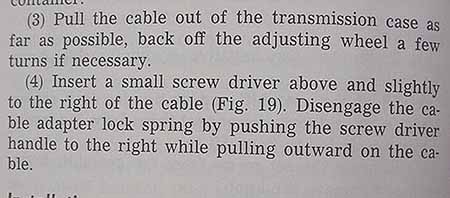
Let's say you prepared yourself and read the service manual text. This photo is the text you would read. See where paragraph 5 says "push the upper projecting portion". The photo above also indicates the screw driver tilting upwards as well. Don't believe it. |
|
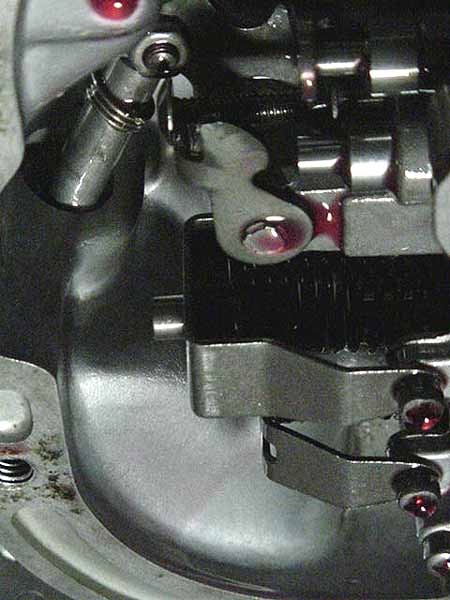
After you fuss for an hour and can't get the cable to release, drop the pan. It is pretty quick and easy and this is the view when you look up into the transmission. It is perhaps hard to tell from this photo, but the tang end of the spring is on the bottom. No wonder you couldn't catch it with the screw driver when you thought it was on the top side. |

|
Here you can better see the tang. |
|
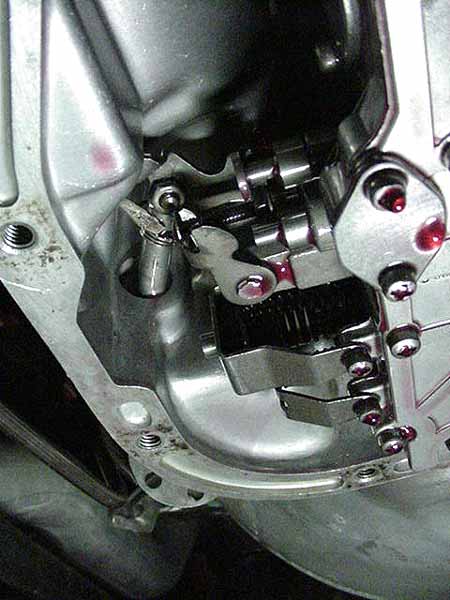
This is what we were trying to do -- catch the spring tang with the screw driver and release the cable. Here the screwdriver is inserted through the neutral safety switch hole and catches the spring tang on the bottom side of the release collar. |
|
A closer view. Next time I do this job I hope these photos help me catch that spring tang with the screw driver. But wait. Keep reading. There is more. |
The 1963 and 1964 service manuals also show the same photo.
|
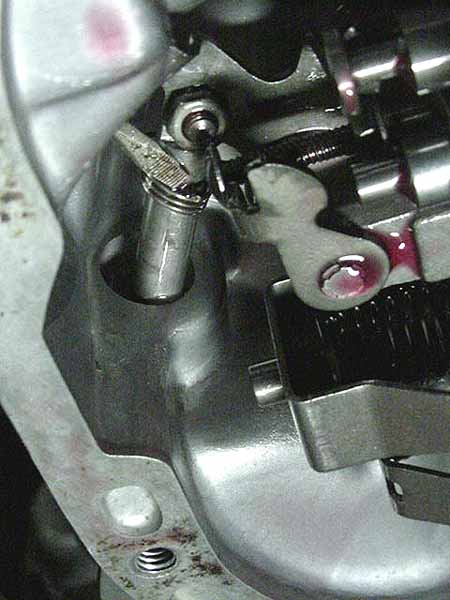
With this method, you reach in from the front and make the attempt to find the release spring. |

|
This is a closer view of the picture above. Note the spring release tang is on top. |
|
The instructions, again saying you will find the spring tang on top. |
After reviewing the service manuals 1957 to 1965, they are consistent in saying you will find the release tang on top. I realize now that my 62 transmission could have had the release spring installed backwards end for end. That would move the tang from the top to the bottom.
What I conclude:
Most likely you will find the spring release tang on top. But if you work and work and can't get it, consider the possibility that the spring tang could be on the bottom.
Final hint:
On installation of the new cable, do not push the collar into the transmission too far. If you go too far the O ring will come out of the bore and it will expand. Pulling the cable back out becomes near impossible with the resistance of the expanded O ring. If you experience this problem, drop the pan, remove the O ring, remove the cable, and start again.
Additional information:
pushing the "1" button fully extends the cable. Pushing the "R" button fully retracts the cable.