|
Distributor Vacuum Advance
John
Grady writes:
I’ve
been working on a 57 Dodge distributor. A lot of what I found applies
to our Letter Cars so I thought I would share some information. I was
going crazy trying to find OEM 1957 parts for the distributor vacuum
advance can. Some that I found were a nice shiny looking part only to
find it had a bad rubber diaphragm. I finally found a fresh new
advance that works.
It
is the VC155 vacuum advance. The good news is it costs only $15 from
Rock Auto and is still a production part from Standard Motor Parts.
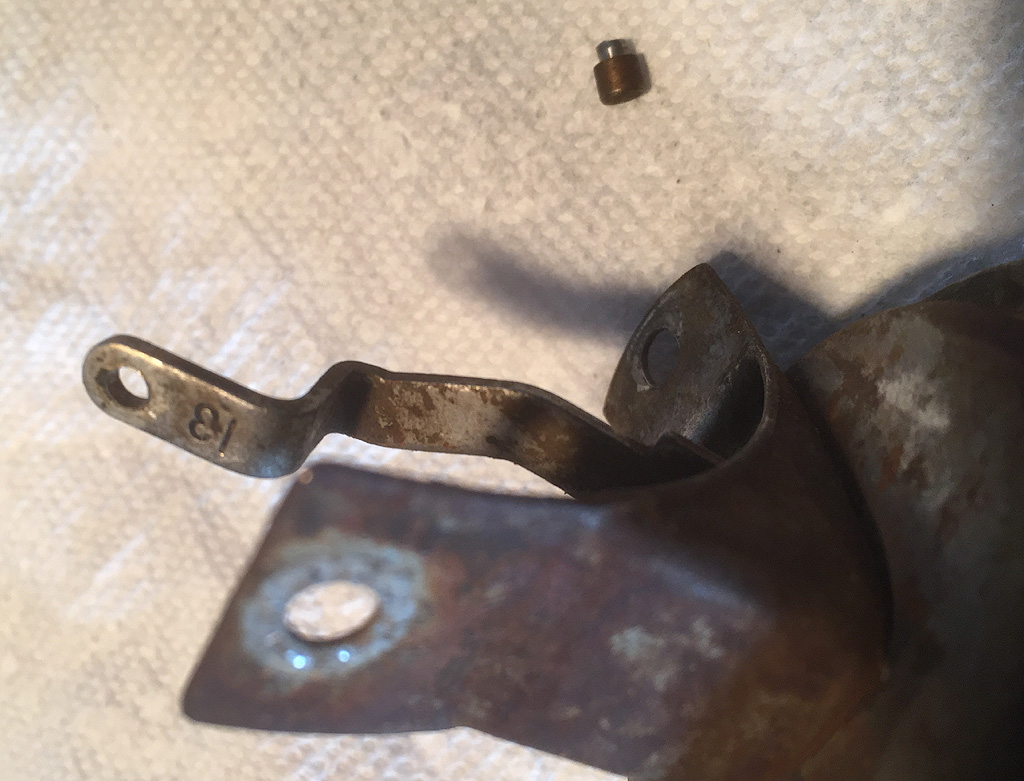
This advance can be adapted to our distributors (A block 1957-58
anyway), just punch out the pin and break off tab (see photo).
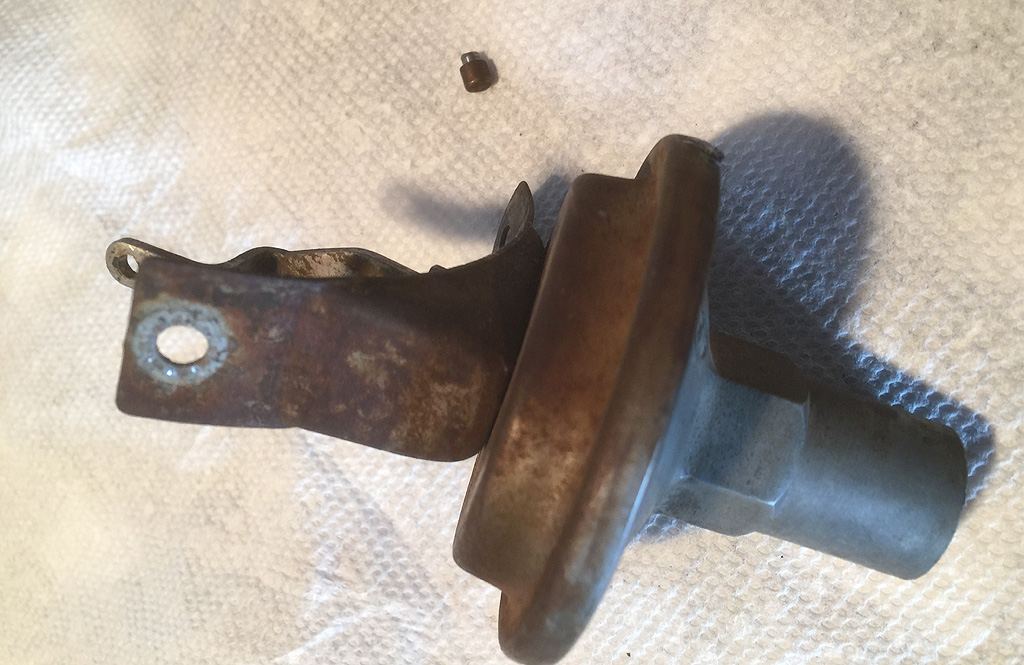
Here is a
1957 Dodge distributor with the VC115 vacuum advance installed. The stock
57 advance was 13 degrees (see next photo). The VC115 advance is 12 degrees. In my opinion,
one less degree of vacuum advance is immaterial. Vacuum starts its
advance at 9”. With 30
degrees max mechanical advance the vacuum advance can add 13 to total 43
degrees and this would be only at light loads such as highway cruise.
This improves gas mileage. The new advance is preset to 12 for a
total of 42. 43 degrees versus 43, that is OK.
Another
point: the wires or tape balls in distributor must not bind the
distributor plate or you get very low gas mileage. Note the lead wire
position and the shape of condenser wire in this photo. It is OK for
the lead wire to go up a bit (within reason) as shown to flex as long
as it does not entangle rotor. There is lots of space up inside the
distributor. Don’t worry, the high voltage will not arc
downwards since the distance is too far and rotor plastic is in the
way. The metal part of the points with spring is at same voltage as
lead wire, so short is not an issue there. The bare wire as shown is
OK as it flexes better than the old wire with hard rubber insulation.

This is
the totally shot 1957 can. The rubber diaphragm was rotted away (*).
(*) Test
the diaphragm with a mity vac while still on distributor to observe
action. Testing it off the distributor may move the diaphragm too
far, damaging it. In real world use, it appears to move only about
3/8”.
|